
After two months of your client having worn their hair extensions, sometimes they can start to look dull because of all the styling and regular wear and tear. By this time, it’s also time for a move-up whether your client is wearing beads, tape, or bond. Here are some things you can do to revive the hair extensions as well as the natural hair before reinstalling the hair extensions. We recommend leaving 24 hours between the removal appointment and the move-up, if possible.
Deep-deep condition. Once the hair extensions are taken out, wash them thoroughly with your favorite sulfate-free shampoo. Follow by using a deep conditioning mask or conditioner. We tried the 3 Minute Miracle deep conditioner by Aussie and fell in love with it. It’s not only budget friendly, it also leaves your hair soft and minimizes the appearance of split ends. You can leave this in both your natural hair and your hair extensions overnight for even deeper conditioning. Try making a super moisturizing cocktail by adding argan oil to the conditioner and mixing them both in the palm of your hands before applying.
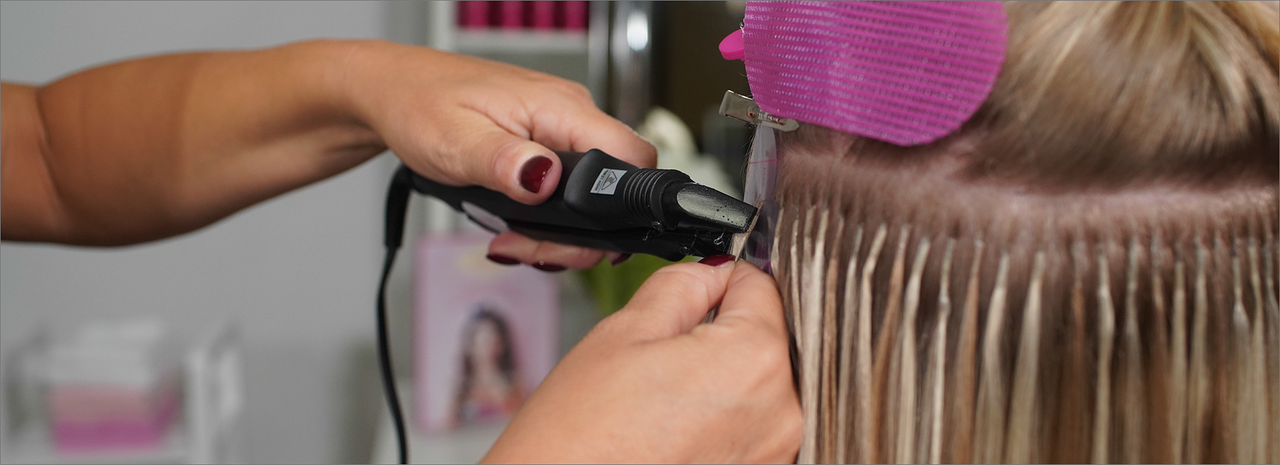
Clarify. With Tape-Ins, of course you want to make sure that all of the tape residue is removed. To ensure that it is, clarify the lining where the tape is placed on the hair extension. This may take a few repetitions to get all of the residue off. Make sure to stay away from alcohol based removers as they can affect the wefts and the way they adhere to natural hair. A common cause of slippage is that most stylists/clients aren’t completely removing the old tape, so wefts begin to slip just within a few days of the touch-up. After a deep conditioning or oil treatment, rinse both the natural hair and hair extensions THOROUGHLY. Failing to do so will definitely lead to slippage no matter what method you’re installing. Make sure your client uses a clarifying shampoo the day of the installation to start with fresh, clean, non-oily hair.
Detangle. After deep conditioning and clarifying the hair extensions, run your extension brush through them and lay them flat to air dry. You’ll avoid matting and tangling this way. After they have dried, tie an elastic band around the extensions to keep them neat and place them in a bag to protect them. This will make life easier during your next appointment since you won’t have to try and separate each strand!
Trim. Using heat tools constantly on hair extensions will lead to fried ends just like it would on natural hair. And like natural hair, every so often you need to trim your ends for a healthier look. This step is a part of blending, but you can also try trimming just a little off the ends of the natural hair, too. The hair extensions will look a lot better and blend in best when you can’t see dry and/or fried ends on the either the hair extensions or natural hair.
These are tips your client can easily do at home and save you time as a stylist, especially when it comes to clarifying the Tape-Ins. Have more advice for our Babe Hair clients? Please share your best tips with us!
